Showing posts with label spray paint. Show all posts

Sunday, February 21, 2010

Organize your pantry!

I picked up these spice jars and quart jars at IKEA a few weeks ago, with the intentions of making my pantry matchy-matchy.  (Oh Lordy I need to ease up on this coordinating OCD, don't I?)  I'd had all of my bulk goods in mason jars, and the spices were in their original plastic containers.  I hated opening the cupboard and seeing masking-tape labeled jars with rusting metal bands and lids that said something like "applesauce 2004" on them. I know what you're thinking: "Buy new bands and lids Jill!"  But that wouldn't be as cute, or as matchy!  So I transfer everything to the shiny new jars and then stand back to look at it all.  Huh.  Is that whole-wheat pastry flour or cornmeal?  And are those cranberries or raisins?  (no, I ain't blind!  But in a dark cupboard they all looked alike!) I needed labels. The wheels starting turning, and I remember I still have some chalkboard spray paint in the garage!  I'll make some adorable little matching chalkboards right on the jars.  Piece of cake, right?


I used a dry erase marker to mark the lines where the masking tape will go. (measure first or you'll end up off-center!)  Make sure you push the tape down really well!

Spray a couple of coats.  Remove the tape and use a fingernail or razor blade to scratch off any over-spray. (Umm...I think I need to do a better masking job next time.  THREE hours later my labels are "square")  Don't forget to prime your "chalkboards" by rubbing a piece of chalk sideways all over it then wiping off.

Enjoy your new matching pantry!  Oh, and yes, that is supposed to be a chicken.  You know: chicken bouillon? 

The Hubs said his "favorite" was the quick oats.  Huh? Why? Don't ask me.  He's a dork.

Wowsers, I need to invest in some normal size chalk!  Sidewalk chalk does not make it easy to write neatly!

I still have a lot more to do, but I love opening the cupboard and seeing all my little jars lined up in a row.  We do what we can to bring order in the chaos that is motherhood!

Stay tuned to see the other projects I've been working on!


Friday, January 1, 2010

Happy New Years! ...and some last minute gift ideas


Happy New Years to all of you blogaholics out there!  I for one, am glad to have arrived safely in 2010.  We had quite the eventful year, including a new baby, a new house, two major hospital stays and the death of two people very dear to us. (We miss you Nathan and Grant!)  But I just know that 2010 will be great.  I hope all of you have an amazing year full of good times and lots of crafty inspiration!


Here are some quickie DIY ideas I'm sure you may have seen across blogland!  They make great last minute gifts.


For the chalkboard above you need:
*Silver tray (I got mine at the Dollar Tree, but see them all over the place!  Test a magnet on it first to make sure it's magnetic)
*Chalkboard paint (I prefer the spray version)
*painters tape
*chalk
*ribbon for hanging or heavy-duty magnets
*hot glue

I found inspiration for these at blackflipflops.  Hers is adorable!  To make this, first you need to mask off the outside edge of the tray with the painters tape.  Really pay attention to the line you are creating so that you won't end up with waves!  Mask over the edge too.  Spray one light coat of chalkboard paint on the masked-off tray, let dry, then repeat twice more.  This should give you a nice solid layer for your chalkboard.  Once dry, remove tape and rub entire surface of chalkboard with chalk, to "seal" it.  Wipe clean and you're done!  If you want to hang it, you can hot glue ribbon to the top, or you can hot glue some heavy duty magnets (at craft stores) to the back to hang it on the fridge!
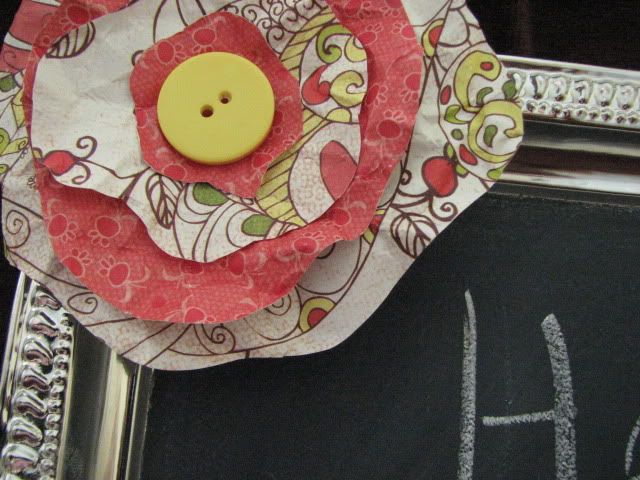


For the flower:
*scrapbook paper
*button
*hot glue, or craft glue

This is SO easy!  Just cut various squares of scrapbook paper, each layer slightly smaller than the last.  Wad each into a ball until it gets that neat wrinkled look.  Then just cut a freeform flower shape from each.  Glue one layer on top of another, then glue a button on the very top.  Secure to chalkboard (or wherever else you want it!) with hot glue or craft glue.  Simple!


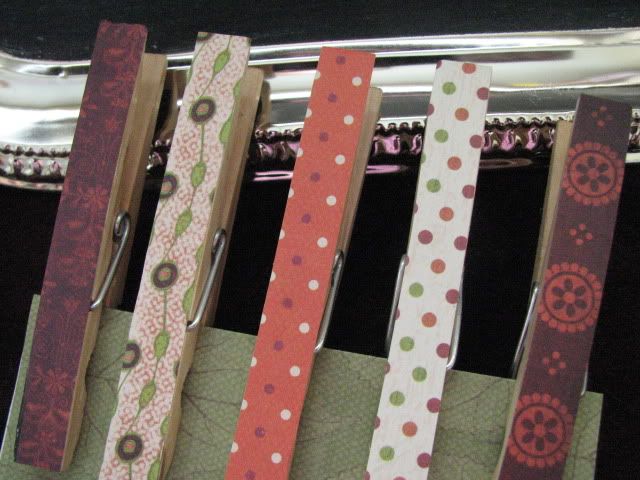
For the clothespin magnets:
*clothespins (Dollar Tree has them!)
*scrapbook paper
*glue
*magnet rolls (mine are 59cents at Joann's)

Using your clothespin as a template, cut strips of scrapbook paper and glue onto one side of clothespin.  Glue (I prefer hot glue, the self-sticking magnets just don't stay on forever) small pieces of magnet onto the opposite side.  So easy!  I also add buttons and ribbon to these.  I got some REALLY cute ones from my good friend Charlotte for Christmas that had ink rubbed onto the edges of the scrapbook paper, making them look vintage-y (is that a word?)

These are so easy to tweak to your liking!  And everyone would love one of these for a gift.  The possibilities are endless!

Saturday, December 26, 2009

Tacky Christmas village re-do

I know, Christmas is over. But I just HAVE to share this one!
I didn't put my Christmas village out this year. You know, the ones with the little houses and tiny people? Well mine happened to be from the dollar tree. I was just over them! As I was packing up my decorations today, I took them out and set them in the give-away pile. A few glances later and an idea struck. Now I'm a fan of spray paint, and my brain is always searching for paint-ables to attack. I had the hubs go out into the FREEZING garage and spray a coat or two on one of the houses. I used cheapo white Home Depot 99cents a can stuff, the kind you can waste. It was one of those houses with the fake looking snow on the roof, and glitter on top of that. After a couple of coats it looked awesome! Seriously awesome. I'm into the white/silver vintagey Christmas decos, so this fits really well.
So out went the rest of the colorful little town to my "painting area" in preparation for their new paint jobs sometime this week. I've got to pick up some nicer glitter first, and some more paint. I'm thinking that they are cool enough to display year-round, if I can find a way to incorporate them. I'll post a tute when I'm finished.
Related Posts with Thumbnails