

 So my oldest has this enormous twin-over-full bunk bed in her room that just has to go. She never uses the top bunk, and I'm sick of staring at a giant pile of animals. But she LOVES her bunks (new house, new bed thing) so we came to a compromise. IF she let me ditch the bed, and replace it with just a twin, I'd make her a big fluffy princess canopy for above her bed. She loves loves princesses and anything girly so she agreed.
I had picked up 16 yards of tulle (4 colors, 4 yds each) at Joann's a month or so ago, and along with a hula-hoop and some fake peonies from the Dollar Tree,, I was all set for supplies.
So, without further ado, here is the tutorial:
Supplies:
*about 16 yards of tulle (the regular stuff on the bolts, I think it's 60" or so?) I used 4yds of 4
different colors
*hula hoop (mine had a circumference of 84")
*Fabric for casing-I used cotton velour that my daughter chose, but you could use cotton or anything else you had.
*Duct tape or electrical tape
*Ribbon, for hanging
*Fabric flowers, extra ribbon, etc.
Directions:
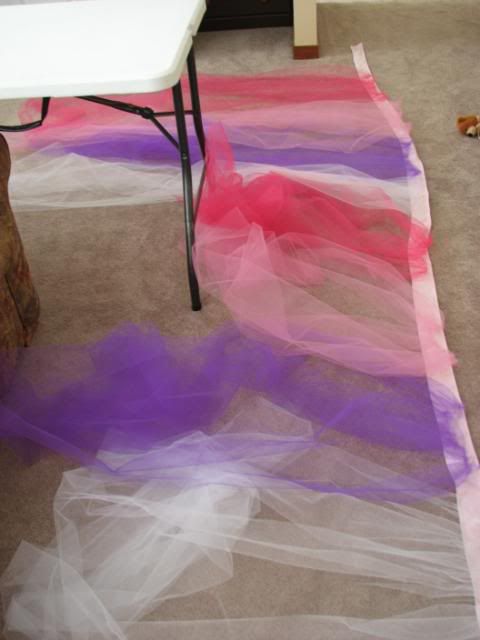
First thing you need to do is to cut your tulle into strips. Because I had four different colors, mine was a bit more complex. I folded each section (4yards each) into half so it was two yards wide and cut on the fold. That gave me two strips 56" wide. In the end I had eight different strips. If you use on color it would be MUCH easier! Set your hoop and tulle aside.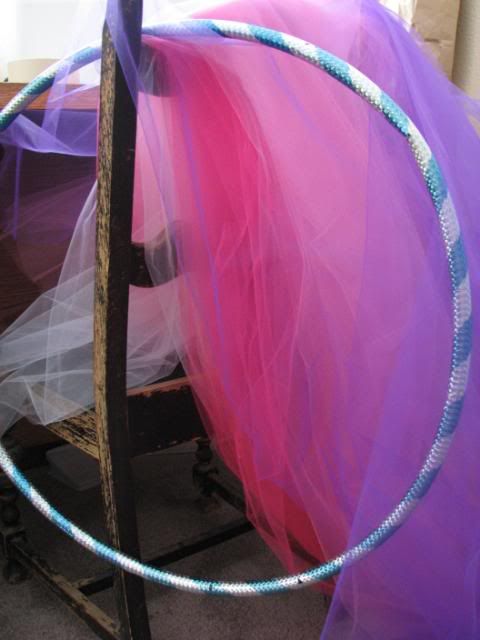 Now you'll need to make the casing for the hoop. Measure the circumference of your hoop around the outside and how wide the casing strip will need to be (to fit around the hoop). Mine was 84" around and I needed about 3" wide strip to fold over the hoop (with room added for a seam) My cotton velour was about 69" long so I doubled it to about 138"(to make it easy!) which allowed for some extra gather on the hoop. Cut your strips out...
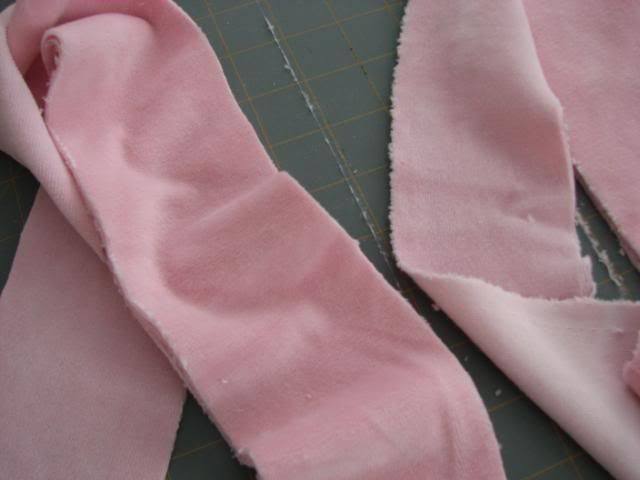 ...then serge the two pieces together to make one long strip. Now you can serge all four sides of the strip, or zig-zag if you don't have a serger. If you're REALLY picky, you can hem the sides, but make sure to leave allowance for that when you cut.
Now for the tulle. I originally left the pieces separate for a more airy look, but in the end I went and sewed all the panels together to make one big honkin piece of tulle. It's your choice...if you have more than one color you can join the pieces or leave them open. If you join them make sure you leave one seam open for an entrance! So, if you decided to leave them separate, gather them all separately. If you joined them together, gather as one big piece. To gather I simply adjusted the tension on my machine to about 6 (mine goes to 9-norm is 4) and set my straight stitch length to the max. This will automatically gather it for you!
Lay the big casing strip out flat with the wrong side up. Lay the gathered piece(s) on top of the casing, pinning in place. IF you decide to add some ribbons to hang down with the tulle, you can add it now, either underneath the tulle (to be on the outside of the canopy) or on top (for the inside) I was out of "pretty" ribbon, so mine will be added later in the week.
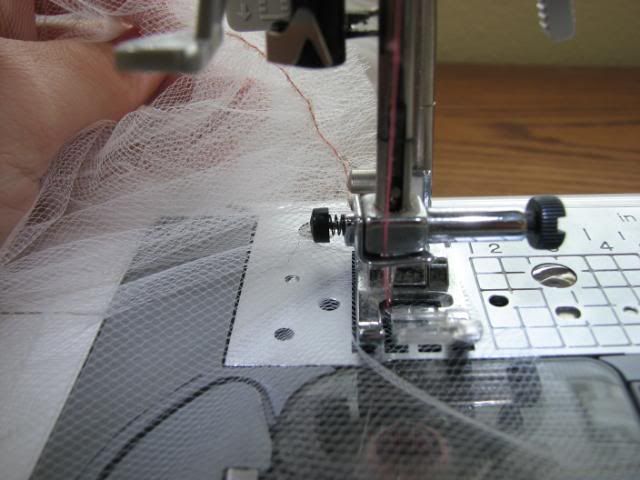
Set your tension and stitch length back to normal on your machine. Then begin to sew the gathers into place. Make sure every few feet or so to tuck the already sewn part behind the machine so it doesn't get in your way. Tulle is easy to accidentally catch!
 You should now have one big piece of tulle with the casing on top.
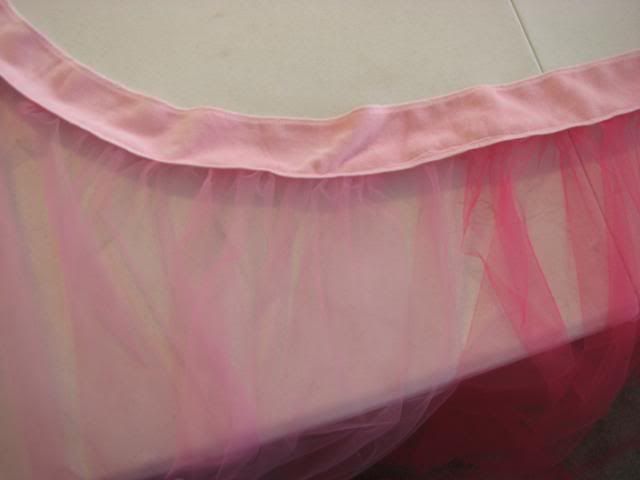 Now it's time to sew the casing closed. Flip the casing over so the tulle is facing up and put under the machine. You can either pin the casing closed (wrong sides together, over the tulle) or you can fold as you go, which I preferred. (Seriously, I hate pinning and it was like 140" worth!)
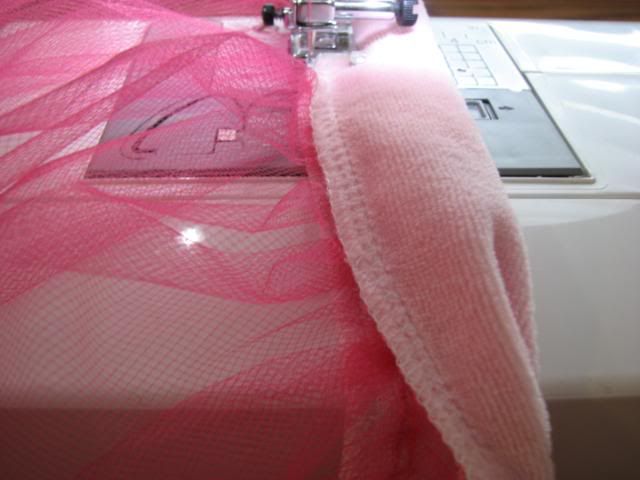 YAY! Hard part is done! Now you can assemble the canopy. First cut the hulahoop in half to create an opening for the casing to go on:
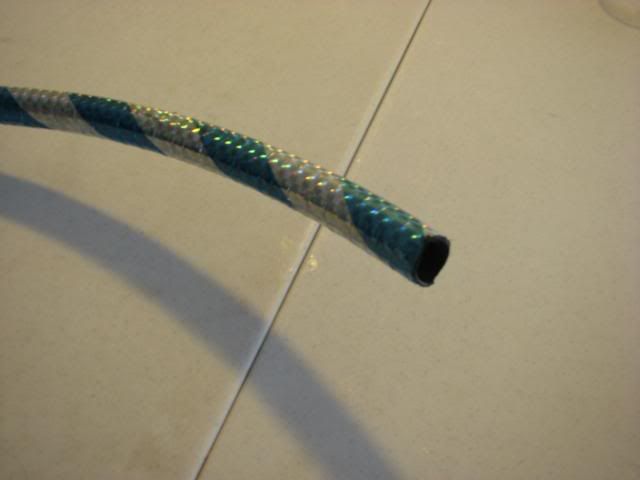 Then pull the casing onto the hoop.
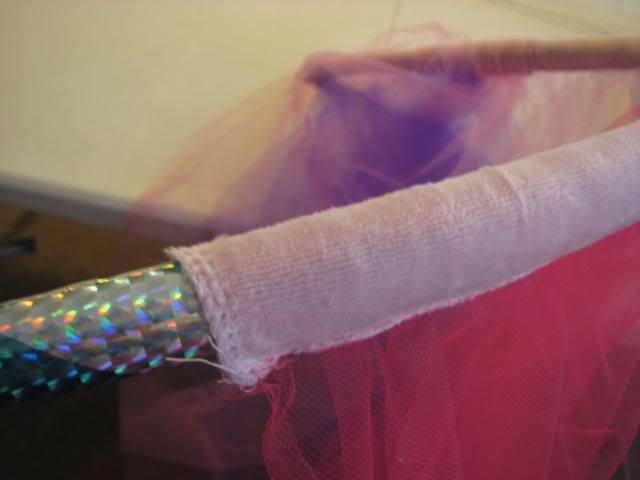 Easy, wasn't it?
Now either duct tape or use electrical tape to close the hoop back up. Make sure you really secure it or it'll get an odd oblong look to it. I go for about 6" on either side of the cut to really hold that sucker on. To attach the ribbon hangers, imagine a big cross on the hoop, and mark with pins where the points would be. Now cut a tiny slit in the tulle and insert a ribbon through and around the hoop and tie:
 Do that on all four points then tie together in the middle, forming a loop for hanging:
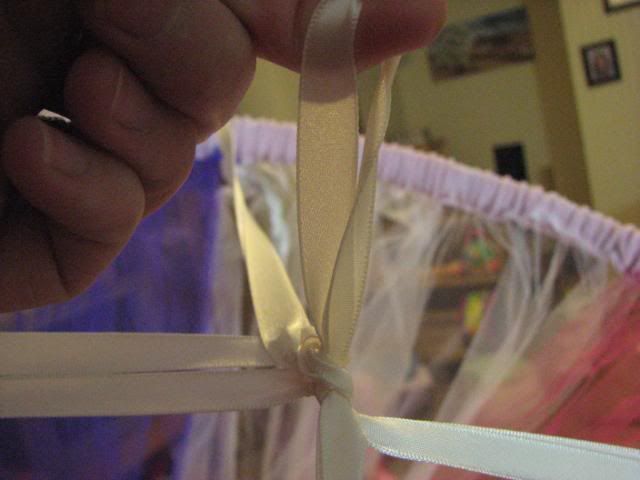 You may have to adjust the length of one or more sides, which is easily done by retying the first spot you tied.
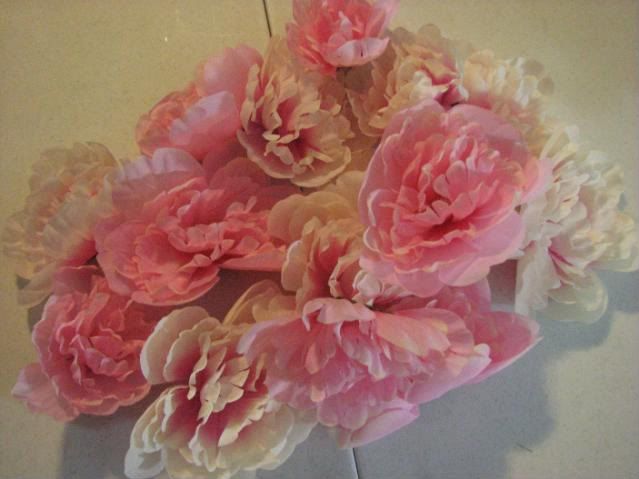
If you want to, you can hot glue (or sew) fabric flowers onto the casing. Make sure to cut the little stem thingy off really short on the underside of the flower before attaching it.
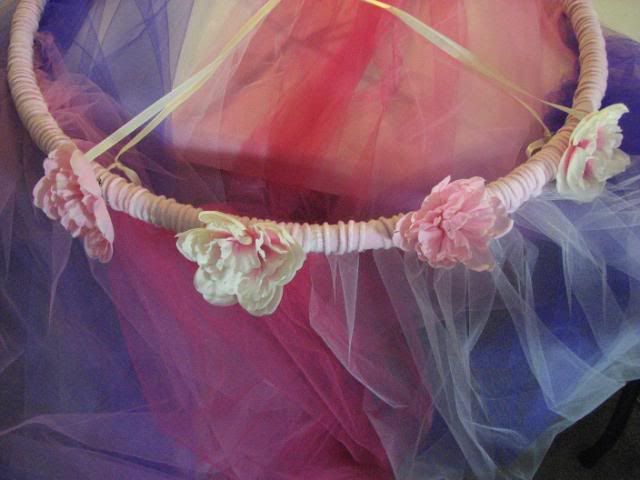
and you're done!
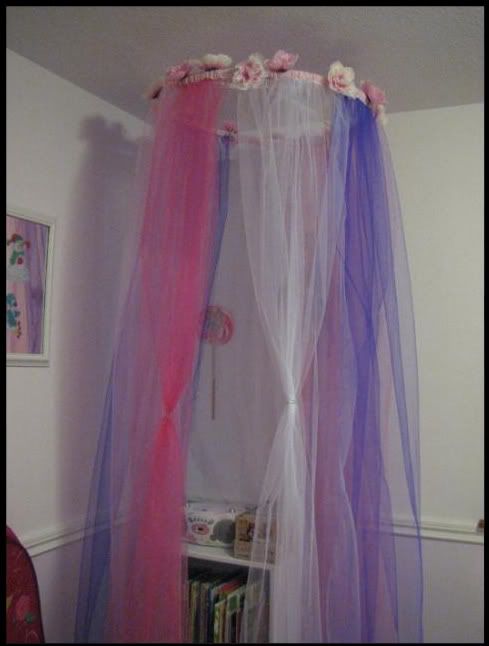
Here it hangs in my daughter's room until the bunk is removed. It will eventually go around her new bed, but that still has to be painted. :)
Oh, I want to quickly share what I made my oldest and her best friend for Christmas:
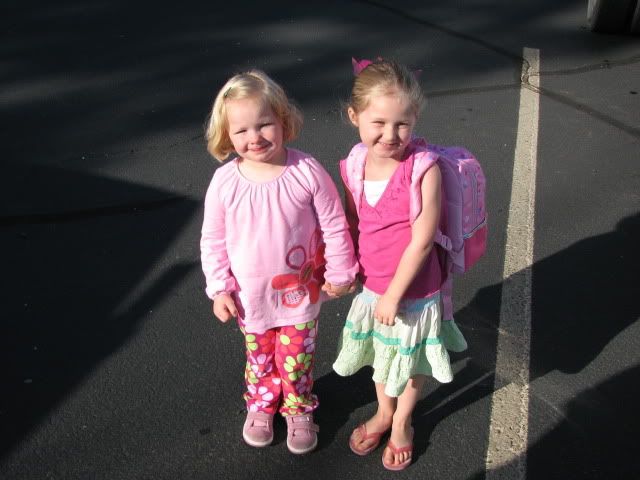
 These are Waldorf dolls. They have simple expressions to encourage imaginative play (not everyone is always as happy as Barbie!) They are also stuffed with wool, which makes the limbs firmer. Wool will take heat from the body as well, making them more cuddly. The blonde is for Beary, and the brunette is for her friend L. Unfortunately, the string holding the eyeline on the blonde (to give the face shape, like on the brown haired doll) must have snapped after I made it. You have to really really pull it tightly, and I'm guessing the string must not have been knotted enough. Oh well, she'll still love it! The dresses I made from Binks old nb sized onsies, which i hacked off and sewed little skirts onto. They are going to open them tomorrow (a little late, I know) and I so hope they like them! Beary isn't exactly a "doll" girl, but I'm hoping that when she sees that L. and her have matching dolls, it will become special. Here they are on their first day of preschool:
 Goodnight!
Here it hangs in my daughter's room until the bunk is removed. It will eventually go around her new bed, but that still has to be painted. :)Oh, I want to quickly share what I made my oldest and her best friend for Christmas:
These are Waldorf dolls. They have simple expressions to encourage imaginative play (not everyone is always as happy as Barbie!) They are also stuffed with wool, which makes the limbs firmer. Wool will take heat from the body as well, making them more cuddly. The blonde is for Beary, and the brunette is for her friend L. Unfortunately, the string holding the eyeline on the blonde (to give the face shape, like on the brown haired doll) must have snapped after I made it. You have to really really pull it tightly, and I'm guessing the string must not have been knotted enough. Oh well, she'll still love it! The dresses I made from Binks old nb sized onsies, which i hacked off and sewed little skirts onto. They are going to open them tomorrow (a little late, I know) and I so hope they like them! Beary isn't exactly a "doll" girl, but I'm hoping that when she sees that L. and her have matching dolls, it will become special. Here they are on their first day of preschool:Goodnight!


No way! I had the hula-hoop idea for almost the same thing, only I was going to make one of those Pottery Barn fabric house thingys. I would love to feature this on my sidebar on Thursday if that's ok with you! It's gorgeous!
ReplyDeleteThis is darling. My daughter would love one of these. I featured this at somedaycrafts.blogspot.com
ReplyDeleteI've been kind of eyeing this sort of thing, but I'll admit that it never occurred to me to CUT the stupid hula hoop to make it a zillion times easier. :>) I linked to this on my weekly roundup - thanks so much!
ReplyDeleteAbsolutely darling, girly and, now, in high demand in our household. Thank you for the extra insight on the hula hoop surgery. My daughter is awaiting her new Fairy Castle.
ReplyDeleteThis is brilliant. I am going to attempt this. :) I might put some bling in there somewhere. Thank you!
ReplyDeleteI havent made mine yet.. I wish I could have seen this before I went shopping.. I bought tons of tulle and a cross stitching hoop.. I'm gonna try and make one for my Daughters Birthday.. Thanks for the tutorial!!
ReplyDeleteI really love your blog , the bed is fantastic!
ReplyDeletecanopy beds
I think I'm going to do this for each of my twin daughters' cribs but do it in a light cream with gold flowers around the top and sewn randomly on the outside! Thank you so much for the tutorial!!!! I can't wait to hit up the fabric store!
ReplyDeleteThe pics are gone! Want to see the pics too!! ��
ReplyDeleteThhank you for writing this
ReplyDelete